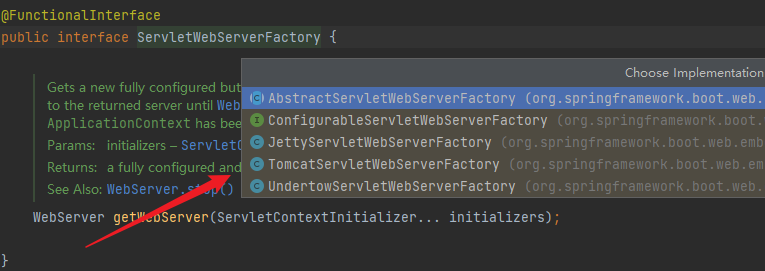
SpringBoot一
内置tomcat
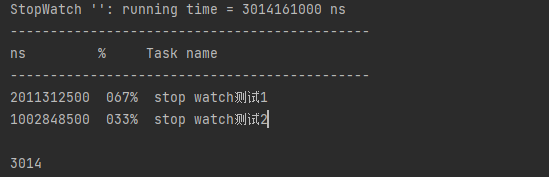
StopWatch计时:
StopWatch stopWatch = new StopWatch();
stopWatch.start("stop watch测试1");
Thread.sleep(2000);
stopWatch.stop();

stopWatch.start("stop watch测试2");
Thread.sleep(1000);
stopWatch.stop();

System.out.println(stopWatch.prettyPrint());
System.out.println(stopWatch.getTotalTimeMillis());
run
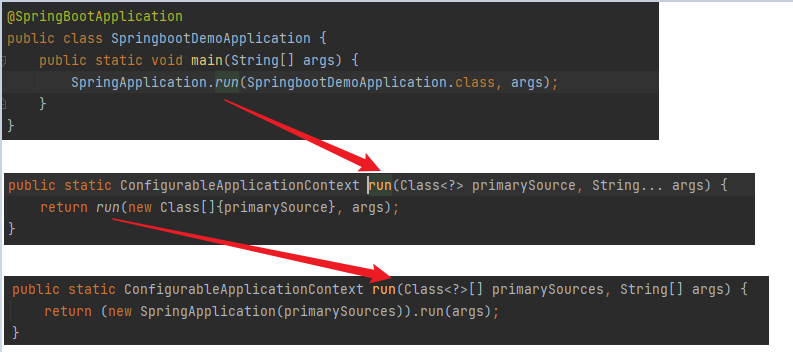
run代码:
public ConfigurableApplicationContext run(String... args) {
    StopWatch stopWatch = new StopWatch();
    stopWatch.start();
    // 引导启动器上下文环境初始化
    DefaultBootstrapContext bootstrapContext = this.createBootstrapContext();
    ConfigurableApplicationContext context = null;

    // Headless模式是系统的一种配置模式。在系统可能缺少显示设备、键盘或鼠标这些外设的情况下可以使用该模式。
    // Headless模式虽然不是我们愿意见到的,但事实上我们却常常需要在该模式下工作,尤其是服务器端程序开发者。
    // 因为服务器(如提供Web服务的主机)往往可能缺少前述设备,但又需要使用他们提供的功能,生成相应的数据,
    // 以提供给客户端(如浏览器所在的配有相关的显示设备、键盘和鼠标的主机)。
    this.configureHeadlessProperty();

    // 运行时监视器
    SpringApplicationRunListeners listeners = this.getRunListeners(args);
    listeners.starting(bootstrapContext, this.mainApplicationClass);

    try {
        // 保存命令行参数
        ApplicationArguments applicationArguments = new DefaultApplicationArguments(args);
        ConfigurableEnvironment environment = this.prepareEnvironment(listeners, bootstrapContext, applicationArguments);
        this.configureIgnoreBeanInfo(environment);

        //打印banner
        Banner printedBanner = this.printBanner(environment);

        //创建应用上下文
        context = this.createApplicationContext();
        context.setApplicationStartup(this.applicationStartup);

        //预处理上下文
        this.prepareContext(bootstrapContext, context, environment, listeners, applicationArguments, printedBanner);

        //刷新上下文
        this.refreshContext(context);
        //再刷新上下文
        this.afterRefresh(context, applicationArguments);
        stopWatch.stop();
        if (this.logStartupInfo) {
            (new StartupInfoLogger(this.mainApplicationClass)).logStarted(this.getApplicationLog(), stopWatch);
        }

        listeners.started(context);
        this.callRunners(context, applicationArguments);
    } catch (Throwable var10) {
        this.handleRunFailure(context, var10, listeners);
        throw new IllegalStateException(var10);
    }

    try {
        listeners.running(context);
        return context;
    } catch (Throwable var9) {
        this.handleRunFailure(context, var9, (SpringApplicationRunListeners)null);
        throw new IllegalStateException(var9);
    }
}
顺着fresh一直走,看到:
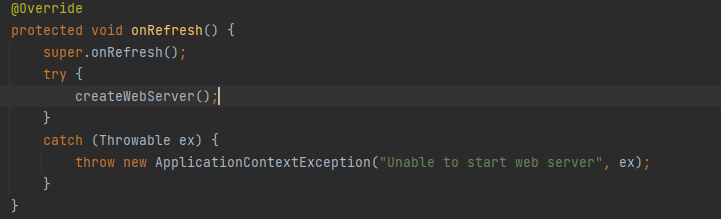
再走,最后看到:
示例
@ResponseBody是作用在方法上的,@ResponseBody 表示该方法的返回结果直接写入 HTTP response body 中,一般在异步获取数据时使用【也就是AJAX】。
@RestController 是spring4里的新注解,是@ResponseBody和@Controller的缩写。
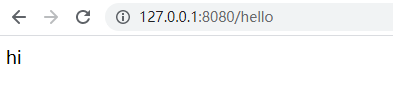
@RestController
public class HelloController {
    @RequestMapping("/hello")
    public String hello() {
        return "hi";
    }
}
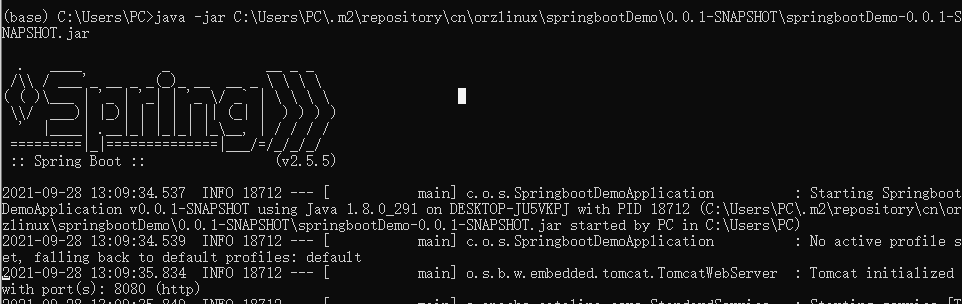
打包jar
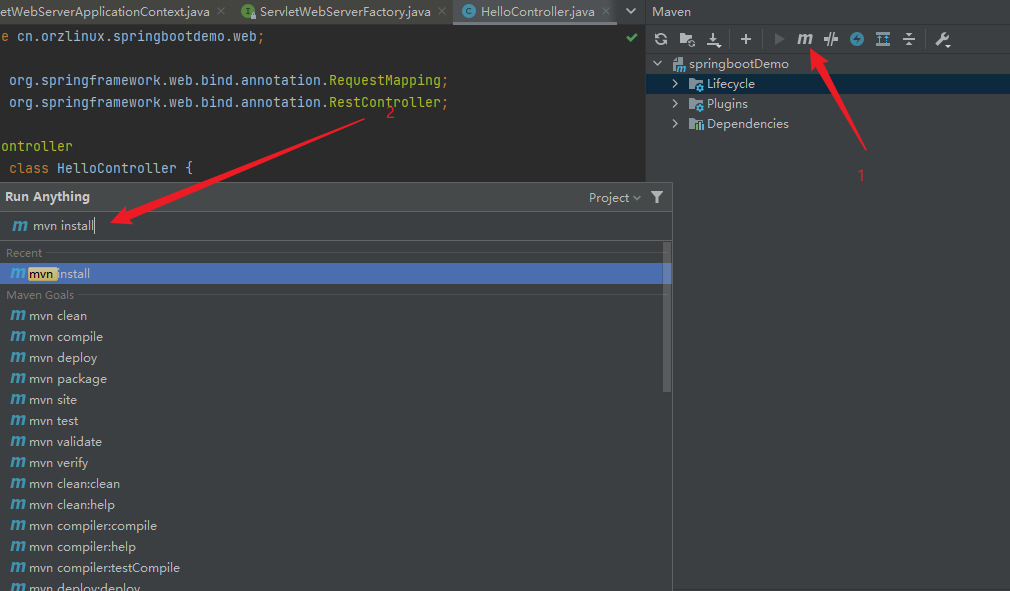
SpringBoot项目既可以打成war包发布,也可以找成jar包发布。
jar包:直接通过内置Tomcat运行,不需要额外安装Tomcat。如需修改内置Tomcat的配置,只需要在SpringBoot的配置文件中配置。内置Tomcat没有自己的日志输出,全靠jar包应用输出日志。但是比较方便,快速,比较简单。
war包:传统的应用交付方式,需要安装Tomcat,然后放到wabapps目录下运行war包,可以灵活选择Tomcat版本,可以直接修改Tomcat的配置,有自己的Tomcat日志输出,可以灵活配置安全策略,相对打成jar包来说没那么快速方便。
跑jsp
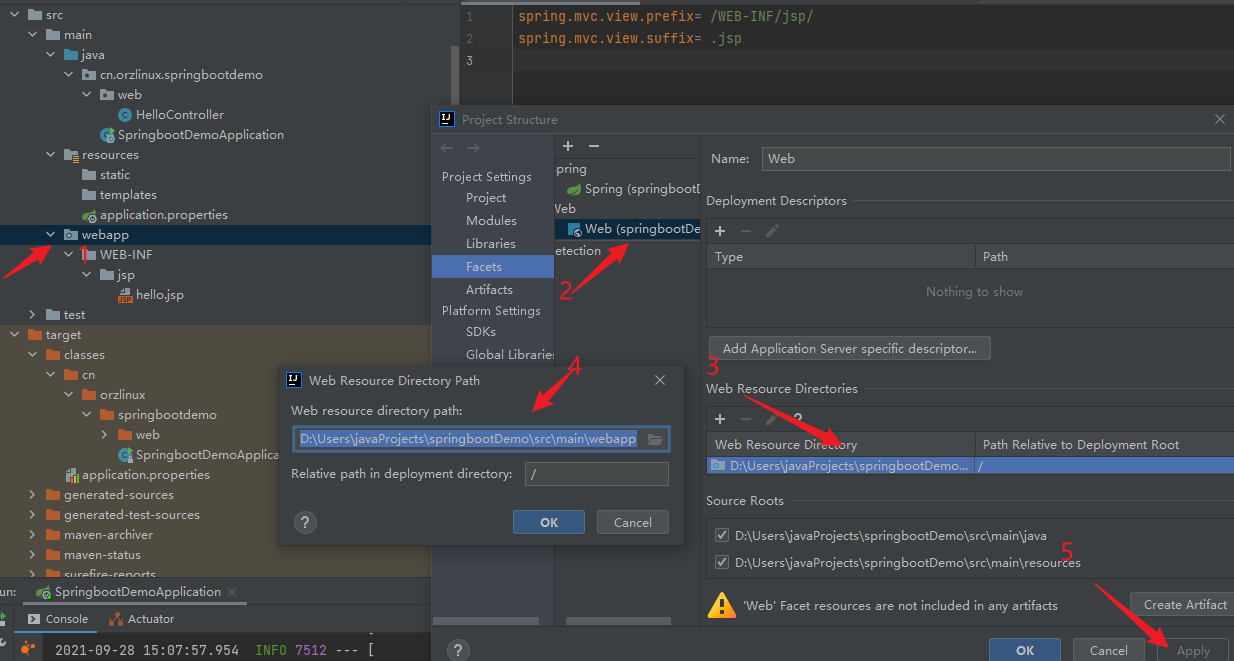
COntroller里面把rest去掉:
@Controller
public class HelloController {
    @RequestMapping("/hello")
    public String hello(Model m) {
        m.addAttribute("now", DateFormat.getDateTimeInstance().format(new Date()));
        return "hello";
    }
}
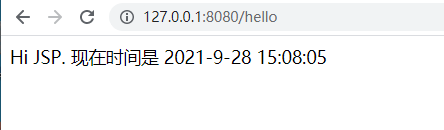
写个jsp:
<%@ page language="java" contentType="text/html; charset=UTF-8"
         pageEncoding="UTF-8"%>
Hi JSP. 现在时间是  ${now}
结果:
maven插件与依赖的关系
依赖:运行时开发时都需要用到的jar包,比如项目中需要一个Json的jar包,就要添加一个依赖,这个依赖在项目运行时也需要,因此在项目打包时需要把这些依赖也打包进项目里;
插件:在项目开的发时需要,但是在项目运行时不需要,因此在项目开发完成后不需要把插件打包进项目中,比如有个可以自动生成getter和setter的插件,lombok,因为这玩意在编译时生成getter和setter,编译结束后就没用了,所以项目打包时并不需要把插件放进去~
错误异常处理
在hello那抛出一个异常:
throw new Exception("some exception");
为了方便对异常的统一管理,spring mvc提供了ControllerAdvice注解对异常进行统一的处理,拿到这些异常信息后,可以做一些处理,比如提供一个统一的web界面查看异常信息。
- @ExceptionHandler:统一处理某一类异常,从而能够减少代码重复率和复杂度
- @ControllerAdvice:异常集中处理,更好的使业务逻辑与异常处理剥离开;其是对Controller层进行拦截
- @ResponseStatus:可以将某种异常映射为HTTP状态码
异常处理:
@ControllerAdvice
public class GlobalExceptionHandler {
    @ExceptionHandler(value = Exception.class)
    public ModelAndView defaultErrorHandler(HttpServletRequest req,Exception e) throws Exception {
        ModelAndView mav = new ModelAndView();
        mav.addObject("exception", e);
        mav.addObject("url", req.getRequestURL());
        mav.setViewName("errorPage");
        return mav;
    }
}

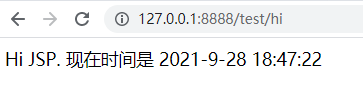
端口号和上下文路径
server.port=8888
#应用的上下文路径,也可以称为项目路径,是构成url地址的一部分。
server.servlet.context-path=/test
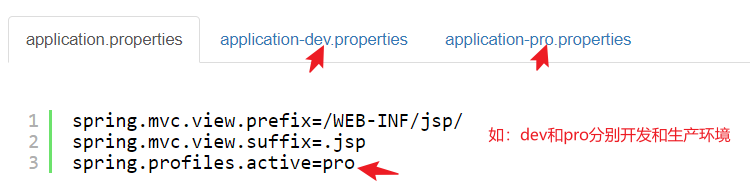
配置切换
yaml配置
spring:
    mvc:
        view:
            prefix: /WEB-INF/jsp/
            suffix: .jsp
server:
    port: 8888
    context-path: /test
JPA
Hibernate 从3.2开始,就开始兼容JPA。Hibernate3.2获得了Sun TCK的 JPA(Java Persistence API) 兼容认证。JPA和Hibernate之间的关系,可以简单的理解为JPA是标准接口,Hibernate是实现,并不是对标关系,借用下图可以看清楚他们之间的关系,Hibernate属于遵循JPA规范的一种实现,但是JPA是Hibernate遵循的规范之一,Hibernate还有其他实现的规范,所以它们的关系更像是JPA是一种做面条的规范,而Hibernate是一种遵循做面条的规范的汤面,他不仅遵循了做面条的规范,同时也会遵循做汤和调料的其他规范,他们之间并不是吃面条和吃米饭的关系。
数据库连接:
application.properties
spring.datasource.url=jdbc:mysql://127.0.0.1:3306/how2java?characterEncoding=UTF-8
spring.datasource.username=root
spring.datasource.password=hqinglau
#  mysql-connector-java 6
spring.datasource.driver-class-name=com.mysql.cj.jdbc.Driver
# 表示会自动更新表结构,所以创建表 这一步其实是可以不需要的~
# spring.jpa.properties.hibernate.hbm2ddl.auto=update
pom添加:
mysql-connector-java
spring-boot-starter-data-jpa
pojo
@Entity
@Table(name = "category_")
public class Category {
    @Id
    @GeneratedValue(strategy = GenerationType.IDENTITY)
    @Column(name = "id")
    private int id;

    @Column(name = "name")
    private String name;
    ...
}
@Entity 注解表示这是个实体类 @Table(name = "category_") 表示这个类对应的表名是 category_ @Id 表明主键 @GeneratedValue(strategy = GenerationType.IDENTITY) 表明自增长方式
-AUTO主键由程序控制, 是默认选项 ,不设置就是这
-IDENTITY 主键由数据库生成, 采用数据库自增长, Oracle不支持这种方式
-SEQUENCE 通过数据库的序列产生主键, MYSQL 不支持
-Table 提供特定的数据库产生主键, 该方式更有利于数据库的移植
@Column(name = "id") 表明对应的数据库字段名
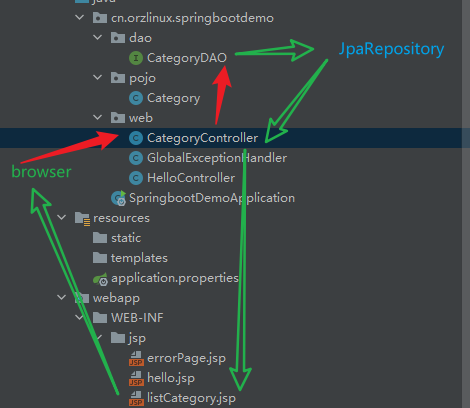
DAO
//提供泛型<Category,Integer> 表示这个是针对Category类的DAO,Integer表示主键是Integer类型。
//JpaRepository 这个父接口,就提供了CRUD, 分页等等一系列的查询了,直接拿来用,都不需要二次开发的了。
public interface CategoryDAO extends JpaRepository<Category,Integer> {
}
controller
@Controller
public class CategoryController {
    @Autowired
    CategoryDAO categoryDAO;

    @RequestMapping("/listCategory")
    public String listCategory(Model m) {
        List<Category> cs = categoryDAO.findAll();
        m.addAttribute("cs",cs);
        return "listCategory";
    }
}
list.jsp
<%@ page language="java" contentType="text/html; charset=UTF-8"
         pageEncoding="UTF-8"%>

<%@ taglib uri="http://java.sun.com/jsp/jstl/core" prefix="c"%>

<table align='center' border='1' cellspacing='0'>
    <tr>
        <td>id</td>
        <td>name</td>
    </tr>
    <c:forEach items="${cs}" var="c" varStatus="st">
        <tr>
            <td>${c.id}</td>
            <td>${c.name}</td>

        </tr>
    </c:forEach>
</table>
流程图:
增删改查
@Controller
public class CategoryController {
    @Autowired
    CategoryDAO categoryDAO;

    @RequestMapping("/listCategory")
    public String listCategory(Model m, @RequestParam(value = "start",defaultValue = "0")int start,
                               @RequestParam(value = "size",defaultValue = "5")int size) {
        start = start<0?0:start;
        // 不支持了
//        Sort sort = new Sort(Sort.Direction.DESC,"id");
//        Pageable pageable = new PageRequest(start,size,sort);
        Sort sort = Sort.by(Sort.Order.desc("id"));
        Pageable pageable = PageRequest.of(start,size,sort);

        Page<Category> page = categoryDAO.findAll(pageable);
        m.addAttribute("page",page);
        return "listCategory";
    }
    @RequestMapping("/addCategory")
    public String addCategory(Category c) {
        categoryDAO.save(c);
        return "redirect:listCategory"; // 客户端跳转,url会变
    }

    @RequestMapping("/deleteCategory")
    public String deleteCategory(Category c) {
        categoryDAO.delete(c);
        return "redirect:listCategory"; // 客户端跳转,url会变
    }

    @RequestMapping("/updateCategory")
    public String updateCategory(Category c) throws Exception {
        // JPA 新增和修改用的都是save. 它根据实体类的id是否为0来判断是进行增加还是修改
        categoryDAO.save(c);
        return "redirect:listCategory";
    }

    @RequestMapping("/editCategory")
    public String editCategory(int id,Model m) {
        Category c = categoryDAO.getById(id);
        m.addAttribute("c",c);
        return "editCategory";
    }
}
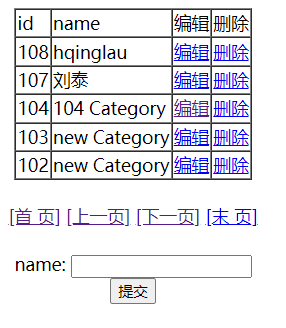
list.jsp
<%@ page language="java" contentType="text/html; charset=UTF-8"
         pageEncoding="UTF-8"%>

<%@ taglib uri="http://java.sun.com/jsp/jstl/core" prefix="c"%>

<div align="center">

</div>

<div style="width:500px;margin:20px auto;text-align: center">
    <table align='center' border='1' cellspacing='0'>
        <tr>
            <td>id</td>
            <td>name</td>
            <td>编辑</td>
            <td>删除</td>
        </tr>
        <c:forEach items="${page.content}" var="c" varStatus="st">
            <tr>
                <td>${c.id}</td>
                <td>${c.name}</td>
                <td><a href="editCategory?id=${c.id}">编辑</a></td>
                <td><a href="deleteCategory?id=${c.id}">删除</a></td>
            </tr>
        </c:forEach>

    </table>
    <br>
    <div>
        <a href="?start=0">[首  页]</a>
        <a href="?start=${page.number-1}">[上一页]</a>
        <a href="?start=${page.number+1}">[下一页]</a>
        <a href="?start=${page.totalPages-1}">[末  页]</a>
    </div>
    <br>
    <form action="addCategory" method="post">

        name: <input name="name"> <br>
        <button type="submit">提交</button>

    </form>
</div>
mybatis
@Controller
public class CategoryController {
    @Autowired
    CategoryMapper categoryMapper;

    @RequestMapping("/listCategory")
    public String listCategory(Model m) throws Exception {
        List<Category> cs=categoryMapper.findAll();
        m.addAttribute("cs", cs);
        return "listCategory";
    }
}
mapper这里可以直接写也可以写xml配置文件
xml:

增删改查
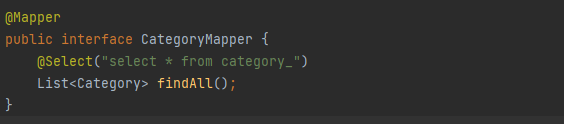
@Mapper
public interface CategoryMapper {
    @Select("select * from category_ ")
    List<Category> findAll();

    @Insert(" insert into category_ ( name ) values (#{name}) ")
    public int save(Category category);

    @Delete(" delete from category_ where id= #{id} ")
    public void delete(int id);

    @Select("select * from category_ where id= #{id} ")
    public Category get(int id);

    @Update("update category_ set name=#{name} where id=#{id} ")
    public int update(Category category);
}
controller
package cn.orzlinux.springbootdemo.web;

import cn.orzlinux.springbootdemo.mapper.CategoryMapper;
import cn.orzlinux.springbootdemo.pojo.Category;
import com.github.pagehelper.PageHelper;
import com.github.pagehelper.PageInfo;
import org.springframework.beans.factory.annotation.Autowired;
import org.springframework.stereotype.Controller;
import org.springframework.ui.Model;
import org.springframework.web.bind.annotation.RequestMapping;
import org.springframework.web.bind.annotation.RequestParam;

import java.util.List;

@Controller
public class CategoryController {
    @Autowired
    CategoryMapper categoryMapper;

    @RequestMapping("/listCategory")
    //在参数里接受当前是第几页 start ,以及每页显示多少条数据 size。 默认值分别是0和5。
    public String listCategory(Model m, @RequestParam(value = "start", defaultValue = "0") int start,
                               @RequestParam(value = "size", defaultValue = "5") int size) throws Exception {
        //根据start,size进行分页,并且设置id 倒排序
        PageHelper.startPage(start,size,"id desc");
        //因为PageHelper的作用,这里就会返回当前分页的集合了
        List<Category> cs=categoryMapper.findAll();
        //根据返回的集合,创建PageInfo对象
        PageInfo<Category> page = new PageInfo<>(cs);
        m.addAttribute("page", page);
        return "listCategory";
    }
    @RequestMapping("/deleteCategory")
    public String deleteCategory(Category c) throws Exception {
        categoryMapper.delete(c.getId());
        return "redirect:listCategory";
    }
    @RequestMapping("/updateCategory")
    public String updateCategory(Category c) throws Exception {
        categoryMapper.update(c);
        return "redirect:listCategory";
    }
    @RequestMapping("/editCategory")
    public String listCategory(int id,Model m) throws Exception {
        Category c= categoryMapper.get(id);
        m.addAttribute("c", c);
        return "editCategory";
    }
}
pageHelper分页
//注解@Configuration 表示PageHelperConfig 这个类是用来做配置的。
@Configuration
public class PageHelperConfig {
    //注解@Bean 表示启动PageHelper这个拦截器。
    @Bean
    public PageHelper pageHelper() {
        PageHelper pageHelper = new PageHelper();
        Properties p = new Properties();
        // offsetAsPageNum:设置为true时,会将RowBounds第一个参数offset当成pageNum页码使用.
        p.setProperty("offsetAsPageNum","true");

        // rowBoundsWithCount:设置为true时,使用RowBounds分页会进行count查询.
        p.setProperty("rowBoundsWithCount","true");
        // 启用合理化时,如果pageNum<1会查询第一页,如果pageNum>pages会查询最后一页。
        p.setProperty("reasonable","true");
        pageHelper.setProperties(p);
        return pageHelper;
    }
}
不生效问题:
改成这个依赖
<dependency>
    <groupId>com.github.pagehelper</groupId>
    <artifactId>pagehelper-spring-boot-starter</artifactId>
    <version>1.3.0</version>
</dependency>
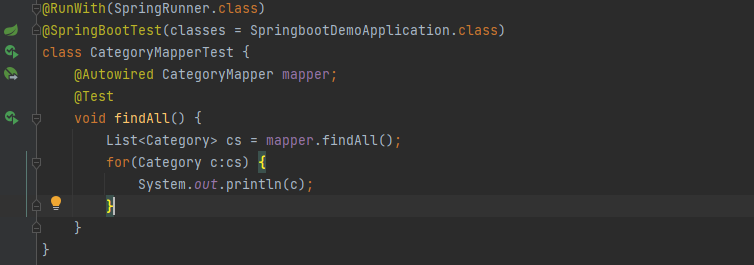
单元测试
图片上传
uploadPage.jsp
<%@ page language="java" contentType="text/html; charset=UTF-8"
         pageEncoding="UTF-8"%>

<form action="upload" method="post" enctype="multipart/form-data">
  选择图片:<input type="file" name="file" accept="image/*" /> <br>
  <input type="submit" value="上传">
</form>
showImg.jsp
<%@ page language="java" contentType="text/html; charset=UTF-8"
    pageEncoding="UTF-8"%>

<img src="/uploaded/${fileName}">
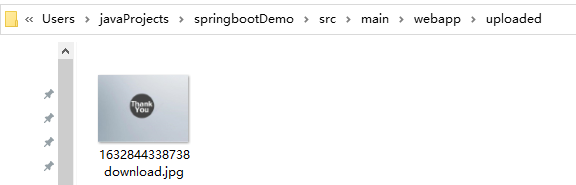
controller.java
@Controller
public class UploadController {
    @RequestMapping("/uploadPage")
    public String uploadPage() {
        return "uploadPage";
    }

    @RequestMapping(value = "/upload", method = RequestMethod.POST)
    public String upload(HttpServletRequest request, @RequestParam("file")MultipartFile file, Model m) {
        try {
            String fileName = System.currentTimeMillis()+file.getOriginalFilename();
            String destFileName=request.getServletContext().getRealPath("")+"uploaded"+ File.separator+fileName;

            File destFile = new File(destFileName);
            destFile.getParentFile().mkdirs();
            file.transferTo(destFile);

            m.addAttribute("fileName",fileName);
        } catch (FileNotFoundException e) {
            e.printStackTrace();
            return "上传失败," + e.getMessage();
        } catch (IOException e) {
            e.printStackTrace();
            return "上传失败," + e.getMessage();
        }

        return "showImg";
    }
}
springboot下载错误
Error: Cannot download https://start.spring.io/starter.zip?
解决方法:使用自定义URL:http://start.springboot.io/
最后一句话